
King Ghidorah Guide: Gravity Beams and Space Control
How to play King Ghidorah in the remaster: using three heads and gravity beams to control space, when to stomp, and how to survive when a brawler gets inside.
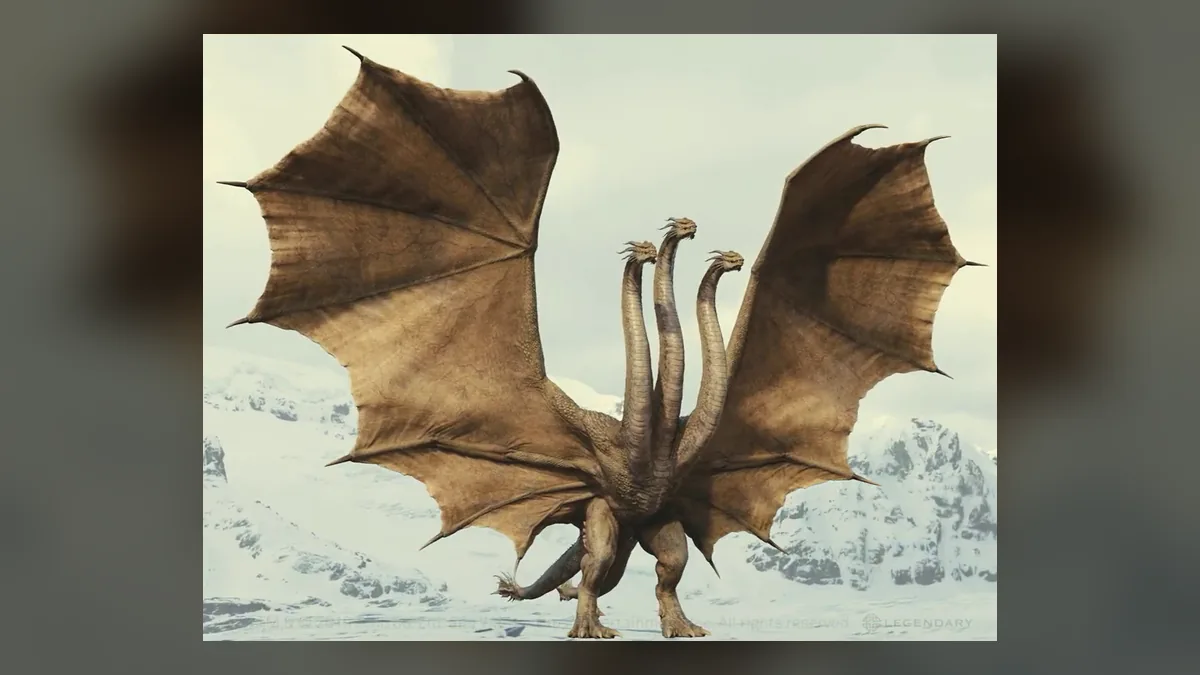
King Ghidorah is the remaster's premier zoner. His three heads give him wide normals, his gravity beams cover long distances, and his size makes him difficult to push around. He is also slow, and his best tools have long animations. A patient opponent who closes the distance can make him look helpless.
The character is a space-control puzzle. You are not trying to hit every beam; you are trying to make the opponent's approach predictable. If they walk forward, they eat a beam. If they jump, they eat a wide normal. If they stand still, you claim more space. The moment they get inside, the puzzle flips.
The toolkit
Gravity beams. King Ghidorah's ranged attack fires from his heads and covers a wide area. It is his primary zoning tool. The exact number of beams and their angles are part of the character's identity, but the important detail is the coverage: it is hard to sidestep all of it at long range.
Wide normals. His three heads and large body give him broad melee coverage. He can catch opponents who try to circle at close range, and his stomps cover the ground in front of him.
Stomps. Slow, high-damage attacks that punish an opponent who is grounded and blocking. They are not fast enough to use as a neutral poke; use them after a beam or a blocked string.
Grab. His grab is slow but has long reach. It punishes an opponent who holds block at mid-range.
Rage Mode. His Rage state enhances his damage and makes his zoning more threatening. Activate it when the opponent is at mid-range and respecting your beams, or when you have just landed a stomp.
If the opponent is circling, fire at the space they are moving into. The goal is to make the approach predictable, not to land a lucky hit.
The neutral game
Ghidorah wants to be at long-to-mid range, where his beams and wide normals are most effective. At close range, he is vulnerable to faster characters and grapplers. The basic loop:
- Claim the center of the arena.
- Fire a beam to make the opponent block or sidestep.
- If they block, fire another beam or step forward for a stomp.
- If they sidestep, use a wide normal to cover the angle.
- If they close the distance, block and look for a grab or a stomp.
The character is about layering threats. A single beam is easy to avoid; a beam plus a wide normal plus a stomp is a maze. The opponent has to choose a route, and you punish the route they choose.
Using Rage Mode
Ghidorah's Rage Mode is a zoning amplifier. Activate it when:
- The opponent is at mid-range and respecting your beams.
- You have just landed a stomp or a grab.
- You need to steal a round and the opponent is low on health.
Do not activate it when the opponent is already inside. The enhanced damage will not help you if you cannot create space. During Rage, use beams to push the opponent back, then follow with a stomp or a grab.
If the opponent is in your face, do not try to out-mash them. Block, sidestep, and look for a grab. Your job is to create space, not to win a boxing match.
Matchups
Vs. Godzilla. Godzilla wants to close the distance. Use beams to make his approach predictable, and punish his slow recovery with a stomp. Do not let him stand at mid-range and fire back.
Vs. Mechagodzilla. A zoner mirror. The player who claims the center and layers beams better wins. Use wide normals to cover his sidesteps, and do not trade beams at max range.
Vs. Kiryu. Kiryu's freeze tools can stop your zoning. Avoid predictable beam patterns, and do not let him close for free. The matchup is about patience.
Vs. Gigan. Gigan is fast and wants to mix you up. Use wide normals and beams to cover his movement. If he gets inside, block and grab.
Vs. Rodan. Rodan attacks from the air. Use beams to cover his landing and wide normals when he circles. Do not chase him.
Vs. Megalon. Megalon's drill and grabs can punish your slow normals. Keep him at range, and do not let him establish the drill range.
Vs. Destoroyah. Destoroyah hits hard and closes space. Block the first approach, then punish the recovery. Your beams can interrupt his advance.
Vs. Orga. Orga is stable at every range. Use beams to claim space and wide normals to cover his approach. The matchup is close to even.
Vs. Anguirus. Anguirus is short and can make your high attacks whiff. Use low beams and stomps, and do not assume your wide normals will connect.
Vs. Mecha-King Ghidorah. The mirror-ish matchup. Both characters want space. The player who uses the cables or beams better wins.
Vs. Godzilla 2000. The faster Godzilla wants to pressure you. Use beams to make his approach predictable, and punish his commitments. Do not let him dictate the pace.
Beginner mistakes
Firing beams at close range. The animation is long, and a fast opponent will punish the recovery. Use beams at mid-to-long range.
Ignoring the stomp. The stomp is slow, but it punishes a blocking opponent. If you only use beams, a patient player will block all day.
Standing still. Ghidorah is slow, but he is not immobile. Reposition between beams so the opponent cannot predict your angle.
Panicking when the opponent gets inside. Block, sidestep, and look for a grab. Do not try to out-mash a faster character.
Using Rage at close range. Activate it when you have space, not when you are trapped.
A simple game plan
- Round start: claim the center, fire a beam to test the opponent's approach.
- If ahead: keep layering beams and wide normals, do not get greedy with stomps.
- If behind: use Rage to push the opponent back, then re-establish the zoning.
- In the corner: block, sidestep, and look for a grab. Do not try to jump out.
- Last hit: use a beam or a wide normal, not a slow stomp.
King Ghidorah is a character who rewards players who think about space. He is not the most technical monster, but he is one of the strongest at controlling the pace of a match. The tier list places him in the top tier for that reason.
Official source: Godzilla: Destroy All Monsters Melee Remastered Trailer Reveals Full 12-Kaiju Roster
For the next read, compare the tier list and the unlock route.
Sources and verification
- The official Godzilla roster article confirms King Ghidorah as one of the 12 playable kaiju.
- Steam confirms the Rage Mode and the single-player campaign structure.
- TOHO Kingdom's original specifics provides the 2002 King Ghidorah context.
- Wikizilla tracks the remaster's roster.
The exact frame data and move inputs may differ from the 2002 release. Check the in-game move list for the final values.
More Godzilla: Destroy All Monsters Melee Remastered Guides
How to play Kiryu in the remaster: the freeze tool, maser zoning, heavyweight normals, and the setup routes that make him the highest-ceiling monster.
How to play the Showa Mechagodzilla in the remaster: armor trades, missile pressure, beam zoning, and the close-range weakness that keeps him honest.
How to play Megalon in the remaster: using the drill to close space, punishing blocks with grabs, and turning a corner into a win condition.
How to play Orga in the remaster: using the shoulder cannon to cover his approach, controlling space with grabs, and why he is a safe second pick.
Start with the right mode, learn blocking and Rage Mode, and avoid the five mistakes that lose most launch-week matches. A practical first-session plan.
How to play Rodan in the remaster: using flight and speed to avoid grounded fights, the heat beam's role, and the matchups that punish reckless dives.
How the control scheme works on PS5, Xbox, Switch 2, and PC, the inputs that matter in a fight, and the settings worth changing before your first online match.
Local split-screen, four-player sessions, and the new online mode explained. What is confirmed, what is still unclear, and how to set up a match.